Showing posts with label recipes. Show all posts

Saturday, December 15, 2012

the drink edition


right on time, my christmas cactus is blooming with cascading beautiful fuchsia blooms.  additionally, one of the orchids i've had for over 2 1/2 years is finally blooming.   it isn't as profuse a bloomer as my other 3 phalaenopsis but I love the color.  

during these chilly winter days, i am usually content to just keep a mug of hot tea or coffee close at hand.  but lately i've been exploring some other drink options.  some for breakfast, some for a lazy afternoon, and some for curling up on the couch in the evening.  i'll let you decide which is best for each occasion.


kale banana smoothie - i love the color of this vibrant drink.  i also love kale, but don't go too crazy with the amount you use.  the first time i made this, i was a bit over zealous.

makes 1 large glass
in a blender mix together:
handful kale, about 2/3-3/4 cup very loosely packed (i usually take out the big stems and coarsely chop the leaves) 
- 1/2 banana
- 1/3 cup apple juice (you could probably use a couple tbsp of agave syrup instead)
- 1/3 cup water
- 3 ice cubes

blend for about a minute


hot vanilla- this year i started seeing recipes for this alternate to hot chocolate so i had to try it.  

serves one
- heat 6 oz of milk (i used 1% milk and added a little bit of half and half to make it a little richer)
add:
- 1 to 2 teaspoons of sugar, to taste
- 1/4 teaspoon of vanilla extract
- dash of cinnamon

mix together.  i have a nifty little frother that is a small stick mixer that can go right into a glass.  it's intended to make the frothy top of a latte or cappuccino.  it's great using it for this.
* it's also tasty to add a splash of cognac*


tequila lime cayenne cocktail - i'm a big fan of tequila lime combinations.  i also love cocktails with a peppery kick.  having a ton of dried cayenne peppers from the garden this summer, i took a bunch and ground them in my spice grinder creating a powder that is easy to add to soups or drinks. 

makes 1 cocktail
mix together in a cocktail shaker:
- 1 shot of tequila
- scant 1 tablespoon of agave nectar
- 1 tablespoon lime juice
- pinch of cayenne pepper
- few ice cubes

pour into a glass, top with seltzer water


Thursday, November 15, 2012

butternut squash deliciousness


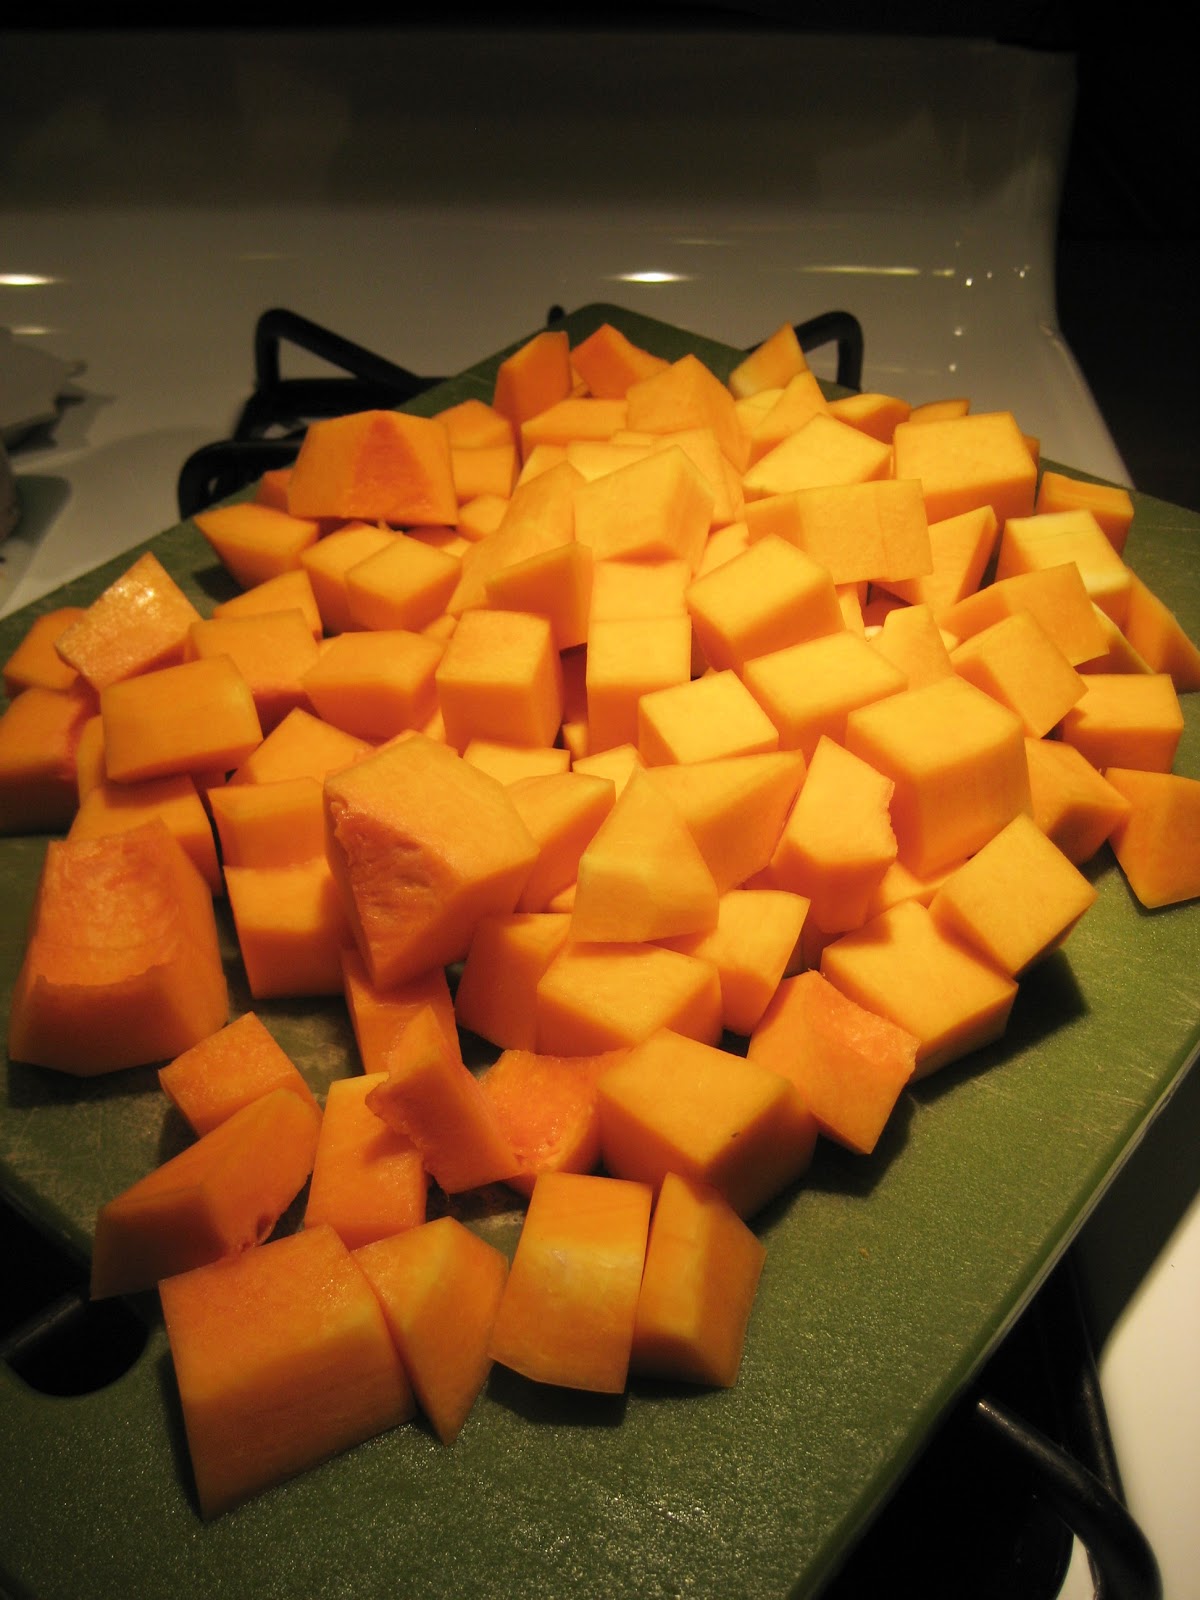
it's been awhile.  no big reason for my hiatus...just found other ways to spend my time.  but i'm feeling inspired again.  here we are again near the beginning of winter.  i'm not a fan of cold weather, but i am a big fan of winter veggies, i.e. squash, root vegetables, greens.  a few nights ago i was looking at a butternut squash, wanting to come up with some different way to prepare it.  soups are good, but i've already been eating a lot of soup and it's still not technically winter yet.  so i decided to go more for a dish that can either be a main course or side dish, with big chunks of roasted squash, chick peas, and avocado all tossed together with a chili lime dressing.  the result was absolutely delicious.  this would be the perfect dish for a holiday pot luck because i think it is best eaten at room temperature.  plus it's full of gorgeous mouthwatering colors.  yum, i can't wait to make it again.


this makes about 4-5 main dish servings
1-1/2 lb to 2 lb butternut squash, peeled and diced into 3/4 in pieces
1 red onion, sliced thinly (about 1/8 in thick)
1 can of chick peas (or about 3/4 cup dried chick peas, cooked)
couple tablespoons balsamic vinegar
olive oil
1-1/2 to 2 tsp cumin
1/2 tsp chili powder
hot sauce (i use sriracha)
juice of 1 lime
1/3-1/2 cup slivered or sliced almonds, toasted
1 avocado, diced
salt to taste

- Preheat oven to 400 degrees
- Toss red onion slices with 1-2 tablespoons of balsamic vinegar and a drizzle of olive oil
- Toss butternut squash pieces with a drizzle of olive oil
- In separate dishes, roast the squash and onion (the squash takes about 30 min and the onions about 15-20 min.)
 - heat a small skillet, and dry roast the cumin.  you have to watch it carefully because it will burn easily.  either stir or shake the skillet while roasting.  it usually takes only a minute or so, but is worth it to get the best flavor from the cumin.  add the chili power and dry roast for another fifteen seconds or so.
- mix together lime juice, a few tablespoons of olive oil, cumin, chili powder, and hot sauce to taste
- stir together squash, onions, chick peas, almonds, avocado and mix in the dressing
- serve room temperature.  i also toasted some pita wedges to eat with it.


Saturday, August 4, 2012

stuffed bell peppers


yes, i know it's been awhile.  i wish i could say it's because i've been travelling around the world for the past 2 months.  but no, i've been here in dc with our record setting summer temps.  the garden doesn't seem to have suffered much from it.  aside from some occasional watering, it still is producing enough that it's hard to keep up.  so far i've canned about 7 quarts plus 10 pints of whole tomatoes, and 3 quarts and 4 pints of tomato sauce.  


the bell peppers have started to ripen nicely the past week or so.  faced with an abundance, an easy fix is to prepare stuffed peppers.  i really like them because once prepared, they freeze easily; and you can pretty much fill them up with any number of combinations.  i usually start with a base of brown rice as the main filler.  then i add some other sauteed veggies, such as onions or squash.  i also had some vegetarian sausage in the freezer that i had made a while ago, so i chopped that up and added it to the mix.  it's a little time consuming but makes a lot which can be frozen easily.  then i add fresh herbs and some kind of cheese.  in this case, i had some ricotta that needed to be used.  i steamed the peppers for a few minutes first, cook all the goods for the stuffing, mix them all together, and then stuff the peppers.

i like to stack them in mini loaf pans.  usually 2 peppers fit perfectly and it helps to keep them upright.  you can them bake them for 15 minutes at 350.  if you freeze them, defrost them in the freezer the night before, then bake at 350 for 20-30 minutes.  since all the ingredients are already cooked you just want it to fully heat through and lightly brown on the top.

it's always a bit of a guessing game as to how much stuffing you need.  in this case, here's what i used for the 6 peppers:
1 cup cooked brown rice
1/2 large onion
1 hot pepper
3 cloves garlic
1 pint of slow roasted cherry tomatoes
1/4 - 1/3 cup ricotta
chopped oregano and basil
grated parmesan


the roasted tomatoes lend a deliciously sweet flavor.  i was roasting some of my large ones, so i went ahead and roasted the cherries too.  it's super easy, but requires a lot of time.  heat oven to 275 degrees.  in a roasting pan, add halved tomatoes (cut side up - except for the cherries, i just cut a slit in them rather than cutting all the way in half).  drizzle with olive oil and sprinkle with salt.  bake for about 3 hours (the cherries took about 2 hours).  after about 2.5 hours, i turned the tomatoes over to let the juices run out more.  then the last 5 minutes i turned on the broiler to get a nice brown on the skin.  they are so intensely flavored.  would be a great addition to pizza or a regular tomato pasta sauce. 


Sunday, February 19, 2012

dinner in 20

i don't have many full fledged dishes that i keep in constant rotation.  but one that i keep coming back to as a quick easy meal is a simple tomato pasta sauce.  it's perfect for a weeknight meal when you want something to throw together quickly, or perhaps on the weekend when the cook has had a couple glasses of wine and realizes she needs to put something together with relative ease (not speaking from experience, of course).

beside the quickness of this recipe, the other thing i love about it is that the ingredients are ones that i almost always have on hand.  

start by putting a pot of water on to boil for the pasta.  i prefer to use penne for this recipe, but this evening only had spaghetti on hand.

while the water is heating prepare the following ingredients:
- 1 jar of tomato pasta sauce (i've used everything from just a can of tomatoes to some homemade sauce i canned from my garden tomatoes) 
- 1 onion, chopped
- 2 to 3 cloves of garlic, diced
- 1 hot pepper, diced
- can of sardines (i've also done this recipe with 1 can of anchovies.  the anchovies tend to disperse more evenly, so if you are turned off by chunks of sardines, it may be a better option)
- 1-2 tbsp of capers (i think this is essential to the sauce)
- grated parmesan (parmesan reggiano of course...life is too short to use any other type of parm.  life is also too short to eat cheap chocolate, but that's for another post)


while the water is boiling, heat a couple tablespoons of olive oil in a pan.  add chopped garlic and hot peppers and cook for about a minute.  add the onions and saute for another 8 minutes or so.  after about 10 minutes, the water should be boiling, so you can add the pasta.  while the pasta cooks, add the tomatoes to the onions.  when the pasta has about 3 minutes left to cook, add the sardines (i usually drain off some of the oil from the can) and add the capers.  stir the mixture and break up the sardines.  when the pasta is done, drain it and then add it to the tomato sauce.  serve with freshly grated parmesan.


Monday, January 2, 2012

hoppin john risotto

hoppin john is the traditional new years day food, at least in the south.  go figure that i didn't ever eat it when i lived there. but then i didn't really care for black-eyed peas when i was younger.  now i love them.  i can't say that i've ever really made authentic hoppin john, but i thought it would be interesting to try some kind of derivative of it. i love the combination of rice, beans, and greens so i started with those basic ingredients but chose to use arborio rice and turn it into a risotto.  my only regret is that i didn't have any bacon.  still though, it was a tasty way to start the new year.  

ingredients:
1 cup arborio rice
7-8 cups stock (i used low sodium veggie bouillon cubes)
2/3 cup dried black-eyed peas
1 big bunch of kale coarsly chopped ( i probably had about a pound)
1 large onion, diced
a couple cloves of garlic, diced
1 hot pepper, diced
1 tsp. thyme
lemon juice
parmesan cheese
bacon (for the next time i make it)


since i used dried black-eyed peas, i cooked them in a pressure cooker first, but canned or frozen ones could be used instead.  

heat the stock in a saucepan and keep just below simmering.  melt 1 tablespoon of butter in a large frying pan over medium heat.  add the arborio rice and stir for about a minute.  add a ladle full of the stock and stir into the rice.  the idea is to keep adding the stock a ladle (about 1/2 -3/4 cup) at a time and letting the rice absorb each ladle full until you add the next.  

while the rice is cooking, heat a large pan with a couple tablespoons of olive oil (or some bacon drippings, yum).  add the onion when the pan is heated. cook the onion for about 5 minutes, then add the garlic, hot pepper, and thyme cooking another minute or so.  (cooking tip:  i'm notorious for heating up oil and then getting distracted, thus forgetting when to add the onion or whatever you are sauteing.  what i do is to add a couple pieces of the chopped onion into the oil as it's heating.  when the oil is hot enough, you'll start to hear the onion sizzling, letting you know it's time to add the rest of it).  

add the chopped kale and stir well.  the pan may be overflowing with kale, but it will cook down pretty quickly.  cook the kale until tender, about 10 minutes.

meanwhile, as you are also cooking the rice, add the black eyed peas after about half way through (about 15 minutes).  continue cooking until the rice it fully cooked (about 30 minutes total cooking time).  add the kale and stir to combine.  cook for a few more minutes, adding more broth if necessary to keep it from being too dry.  finish it off with a squeeze of lemon, salt, and pepper (and crumbled bacon if you have it).  i grated a little parmesan cheese on top which was tasty.  

i also roasted some parsnips and sweet potatoes with rosemary to have on the side.


Saturday, August 13, 2011

okra 2 ways


i'm a southern girl, and i love okra.  not only is it great to eat, but the blossoms are a gorgeous hibiscus-like shape.  i know a lot of people are turned off of okra because of the slime factor.  i agree that can be a bit hard to overcome, but there are 2 ways i love to eat it that have changed the minds of people who consider themselves non-okra eaters.  


i am growing two different types of okra.  a green one and a burgundy one.  there isn't any difference in the flavor, i just love the way the two compliment each other visually.


pickled okra

this is a quick easy way to prepare okra. for about 3/4 lb of okra (i've found that fills a quart mason jar), mix together in a saucepan 1 cup water, 1 cup vinegar, 2 tablespoons sugar, 1 tablespoon salt, and then whatever spices you may have on hand.  good ones to use are fennel seeds, cumin seeds, coriander seed, and peppercorns.  i put in about a teaspoon of each.  bring to a boil and cook the mixture for a couple minutes making sure the salt and sugar dissolve.  then pour the mixture over the raw okra (i like to combine it all in a mason jar), along with a hot pepper that has been cut in half.  if you have fresh dill, add a few sprigs as well.  let cool and then store in the refrigerator.  they will keep for a couple weeks.  i like to just eat them straight out of the jar.  they have a wonderful crunchy texture and vinegary flavor.  


roasted okra

this is such a simple way to prepare okra, but you have to endure having your oven on, which in the summer isn't the most comfortable thing to do. 

heat oven to 400 degrees.  toss okra (keep them whole!) with some olive oil, and salt.  if you have fresh herbs like basil or mint, tear a handful over the okra as well.  roast in a baking dish, or baking sheet for 15 to 20 minutes or until they have softened and are getting a little brown.  stir them once half way through the cooking.  


Sunday, August 7, 2011

fried squash blossoms

zucchini and squash plants are notorious for providing so many copious vegetables that by midsummer you are begging anyone, friends, neighbors, strangers to just take some off your hands.  but there's more to a squash plant than the vegetable (well, technically the fruit).  

years ago in italy, i had fried zucchini blossoms and since then have been wanting to try to recreate the delicacy for myself.  this summer, i took to the internet to figure out the proper way of preparing them.  squash and zucchini plants are monoecious, meaning they bear both male and female flowers.  the actual squash fruit comes from the female flowers.  i had always assumed that to make fried squash blossoms you'd be sacrificing some of the fruits by taking away the flowers, but it turns out the male flowers are supposed to taste better, so that is what you use.  it's easy to tell the difference because the female flowers have the fruit forming at the base of them. 

i picked about 10 flowers from my plants (i picked the ones where the blooms were still closed).  the recipes i found said to pinch out the stamen in the middle of the bloom, which was a bit difficult to do without tearing the blossom.  you also want to check inside the blossom to make sure there aren't any renegade insects trapped in there.

i decided that i wanted to stuff the blossoms with something before frying them.  the first time i made them i used homemade ricotta (so simple to make, and absolutely delicious)!  the second time i used goat cheese.  i didn't realize until i began stuffing the blossoms that i had bought goat cheese with honey, but it actually turned out quite well.  the sweetness of the honey was a nice foil to the fried blossoms.  

one trick i learned after the first time i made them was to make sure the ends of the blossoms were twisted shut well.  in fact i even used a little of the cheese as 'glue' to keep them shut.  otherwise you risk them opening and having the cheese come out while they are frying.  i made a simple batter of flour and beer, coated them and then put them in an inch of oil heated to about 350 degrees.  the hardest part was just keeping the oil around that temperature. 

once they turned golden brown, after just a couple minutes, i took them out, set them on a paper towel and sprinkled them with salt.  that was it.  a perfect summer treat.

Saturday, July 9, 2011

fresh tomato pizza


it looks like the tomato bottom end rot crisis has been averted.  as you can see the tomato harvest bounty has begun.  i went out of town for 4 days and came back to a garden full of delicious veggies ready to be eaten.  besides just making a quick tomato salad with olive oil, vinegar, salt and basil, one of my favorite quick ways to eat them is on pizza.  i have in the past tried to make my own pizza dough, but i don't think it tastes any better than the dough you can get at trader joes, plus it's a lot easier and quicker to use the ready made stuff.

i first made a quick sauce for the pizza by chopping up some of my roma tomatoes.  since i didn't want to spend a long time cooking the sauce, i've found that a quick easy way to add more flavor is to simply add a few tablespoons of tomato paste.  the concentrated flavor in the tomato paste really adds to the sauce.  i also added some garlic and olive oil.  

once the sauce was ready, i cut up some of my yellow golden girl tomatoes, some fresh mozzarella, and some fresh basil.  i decided to use the purple basil because i thought it contrasted nicely with the yellow tomatoes.  i baked the pizza at 450 degrees for about 12 minutes.

ready for the oven


ready to eat

fresh tomatoes, basil, and mozzarella.  it's no wonder the colors of the italian flag are green, white, and red.


here's a little tip regarding tomato paste.  since it's nearly impossible to use all of a can of tomato paste in one recipe, i scoop out portions about 1 tablespoon each.  i wrap each portion in plastic wrap, then put into a freezer bag and freeze them.  whenever i need a little tomato paste, i just pull out one of the packets and throw it into whatever i'm cooking.  it defrosts pretty quickly.

Saturday, May 28, 2011

root vegetables with quinoa and rice

spring is in full force now and the spring greens are growing seemingly without bounds. but i know it will still be another 5 weeks or so until the main summer event even begins (tomatoes, peppers, squash, cukes, eggplants, etc.).  in the meantime, i still have cravings for some of the winter offerings, especially root vegetables.  the other night i roasted some beets, sweet potatoes, and parsnips and mixed them with some quinoa and bhutanese red rice, a wonderfully nutty rice with a gorgeous reddish brown color. it proved to be a delicious dinner, and quite colorful too.     

cut up a few parsnips, one large sweet potato, and 3 medium beets into small pieces so they will cook relatively fast and evenly.

toss the veggies in olive oil before roasting them at 400 degrees for 15 - 20 minutes.

half a cup of bhutanese red rice and half a cup of quinoa.

the rice and quinoa cook the same amount of time, 20 minutes in the same proportions with water (1 part rice/ quinoa to 2 parts water).

while the veggies roast and the grains cook, thinly slice an onion and saute it until golden brown.  then push the onions to one side of the skillet. heat some additional oil in the empty side.  to the oil add cumin, paprika, ground ginger, turmeric, coriander, and cinnamon, stirring the spices in the oil for about a minute to develop their flavors before stirring them into the onions.

mix all the ingredients together to combine, add a dollop of hot sauce (my favorite is sriracha, commonly found in vietnamese restaurants), and then top with fresh cilantro.

Tuesday, April 12, 2011

beets - love 'em or hate 'em

i tried growing beets last year, and i must admit i don't think i quite succeeded.  the ones i harvested were never more than an inch in diameter even though i left them in the ground longer than recommended.  they were tasty, but not big enough really to do much with.  maybe one of these days i'll try growing them again.  until then, i'll have to make do with ones available at the grocery store.

in my experience there tend to be 2 kinds of people:  those who love beets and those who hate them.  there don't seem to be many folks in the middle of the beet continuum.  as for me, i'm in the love them category.  i love everything about them - their deep purple red color, their earthy, sweet taste, even the greens.  but i've always felt a little limited in ways to prepare them.  a few months ago i came up with this recipe adapted from one that i found in Madhur Jaffrey's World Vegetarian cookbook, and now i can't get enough of it.  while i can't guarantee it will make a beet lover out of someone who can't stand them, if you do like beets, you should try this.  i prefer it room temperature, so if it's been in the fridge, i find it's best to nuke it for 20-30 seconds just to take the cold edge off.  the proportions are for approximately 3 medium sized beets (2 to 2-1/2 in. dia.).

boil beets whole, unpeeled (i use a pressure cooker - a great time saving device) until softened.  in a food processor combine about 1/2 cup walnuts, 1/4 -1/3 cup good quality olive oil (it's worth using a really good olive oil since it's not being cooked), a pinch of salt, a clove of garlic, and a handful of parsley.  pulse a few times until it's blended.  slightly cool the cooked beets, peel, and coarsely chop.  mix beets and walnut/ oil mixture together.  that's it.  so simple and so delicious!   

   note: it's important that the chef have a glass of 
   wine while cooking - walnuts, olive oil, and wine:  
   all heart healthy!

   gorgeous red beets

   no need to serve on a plate - just eat straight 
   out of the bowl

Saturday, April 2, 2011

braised butternut squash

a few weeks ago i cooked up the last of my butternut squash from last fall's harvest.  i had ended up giving away at least half of the harvest, but the nice thing about them is that they last for months.  i had grown tired of butternut squash soup so i ended up improvising a braise to cook it up.  i mixed in some leeks with the chopped butternut, along with some rosemary from the garden, a few grates of nutmeg, a couple pats of butter, and about a cup of homemade chicken broth.  i then cooked it in a covered dish for about an hour in a 325 degree oven.  after that, i took off the lid, cranked the oven up to 425, added about 1/4 of cream (you can never go wrong with adding cream) and cooked it for about another half hour.  it ended up delicious and left me with leftovers that i really looked forward to.  i'll have to remember this one for next year's harvest